11 AC Unit Maintenance Tasks That Prevent Costly Repairs (Expert Checklist)
1 June 2026
Poor AC unit maintenance could be costing you hundreds of dollars each year. Australian households spend upward of 27 percent of their total yearly energy budget on air conditioning, and neglecting upkeep drives that figure higher. Dirty evaporator coils can increase energy costs by about 5 percent, while undercharged refrigerant can more than double your unit’s energy use. Routine maintenance extends your system’s lifespan and prevents mid-summer breakdowns while improving indoor air quality. This expert checklist from BG Electrical & Air Con covers 11 tasks that include everything in keeping your AC running year-round.
Clean or Replace Air Filters Regularly
Your air filter captures dust, allergens, pollen and airborne particles to keep indoor air clean and healthy. Your system works harder and uses more energy when filters become clogged. This reduces its lifespan overall. You can increase your system’s efficiency by 5 to 15 percent when you replace a dirty, clogged filter.
Why Air Filter Maintenance Matters
A blocked filter restricts normal airflow and decreases system efficiency by a lot. Dirty filters prevent proper filtration of dander, allergens and pollen. This can worsen respiratory health. The strain on your system also increases wear and tear, which shortens equipment life. Lack of maintenance and accumulated dirt rank among the major causes of HVAC failure.
Clogged filters force your air conditioner to work harder to pull in air, cool it down and release it back into your home. This increased strain raises energy consumption by up to 15 percent.
Clean your air conditioner filters every 1 to 3 months. Usage and environment determine the frequency. Standard 1-inch pleated air filters need changing every 30 to 60 days, while 2-inch pleated filters last around 90 days. Thicker 4-inch pleated filters can remain effective for 6 months. Filters that are 5 to 6 inches may last 9 to 12 months.
Several factors accelerate filter replacement needs. Homes with pets require more frequent changes due to pet dander and hair. Replace filters every 30 days if you run your air conditioning constantly during summer. Households with smokers, allergy sufferers or excessive dust may need filter replacements twice monthly. Larger homes circulate higher air volumes and trap more particles. This makes more frequent filter checks necessary.
Step-by-Step Filter Cleaning Process
Turn off your air conditioner at the main power source before starting. Gently open the front panel to access the filter for wall-mounted or split-system units. Ducted systems require removing the return air grille on your ceiling.
Use a vacuum cleaner to remove loose dust from the filter’s surface. Rinse the filter under lukewarm water to eliminate remaining dirt and debris gently. Apply mild detergent for dirty filters, but avoid harsh chemicals or aggressive scrubbing that can damage filter material. You can clean large ducted system filters with a hose using a gentle spray.
Allow your filter to air-dry. This may take several hours. A damp filter leads to mold growth and system damage when reinstalled. Return the filter to its original position once dry and ensure it sits securely.
Signs Your Filter Needs Attention
Reduced airflow from vents indicates restricted air movement. Dust accumulation around vents and registers shows the filter can no longer trap particles well. Unusual noises like whistling, rattling or banging suggest your system doesn’t deal very well with restricted airflow. Hot and cold spots throughout your home point to uneven air distribution caused by blockage.
Rising energy bills without increased usage signal your system runs longer to maintain temperature. More frequent sneezing, coughing or difficulty breathing indoors indicates allergens circulate unchecked. Replace your filter right away if it appears damaged, torn, excessively worn or no longer cleans well.
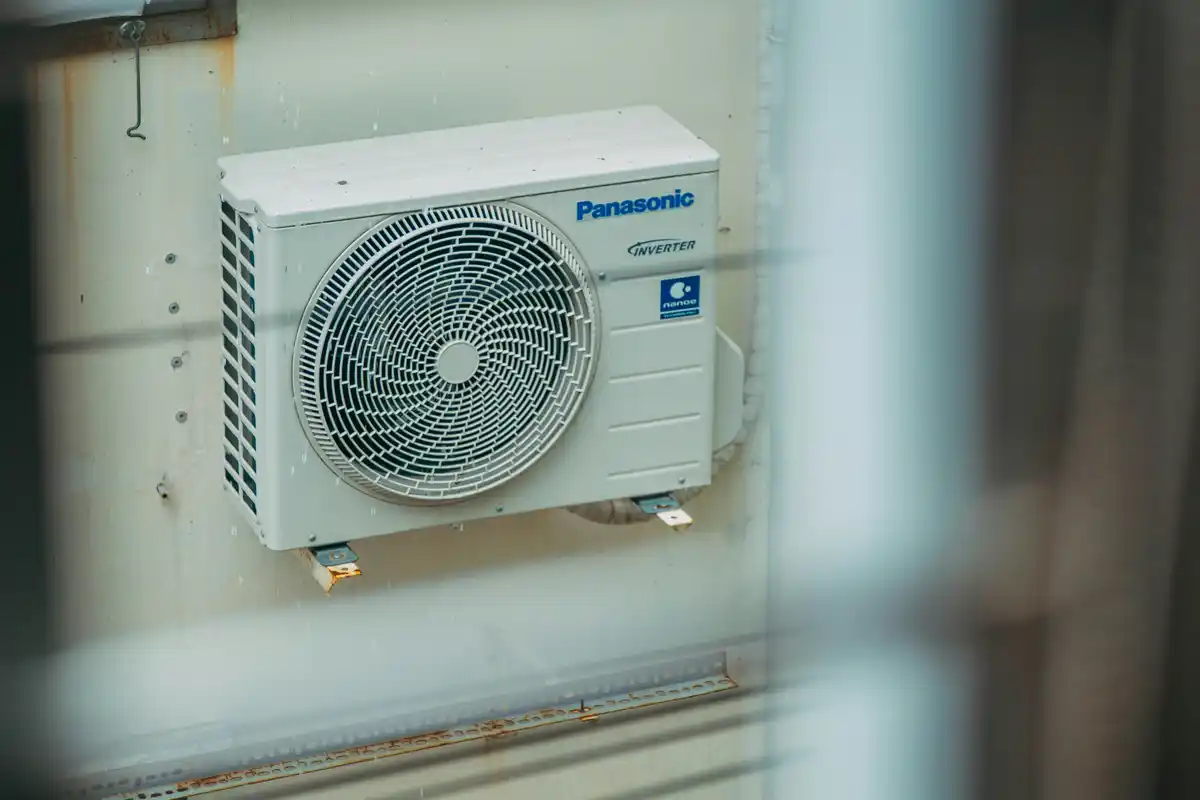
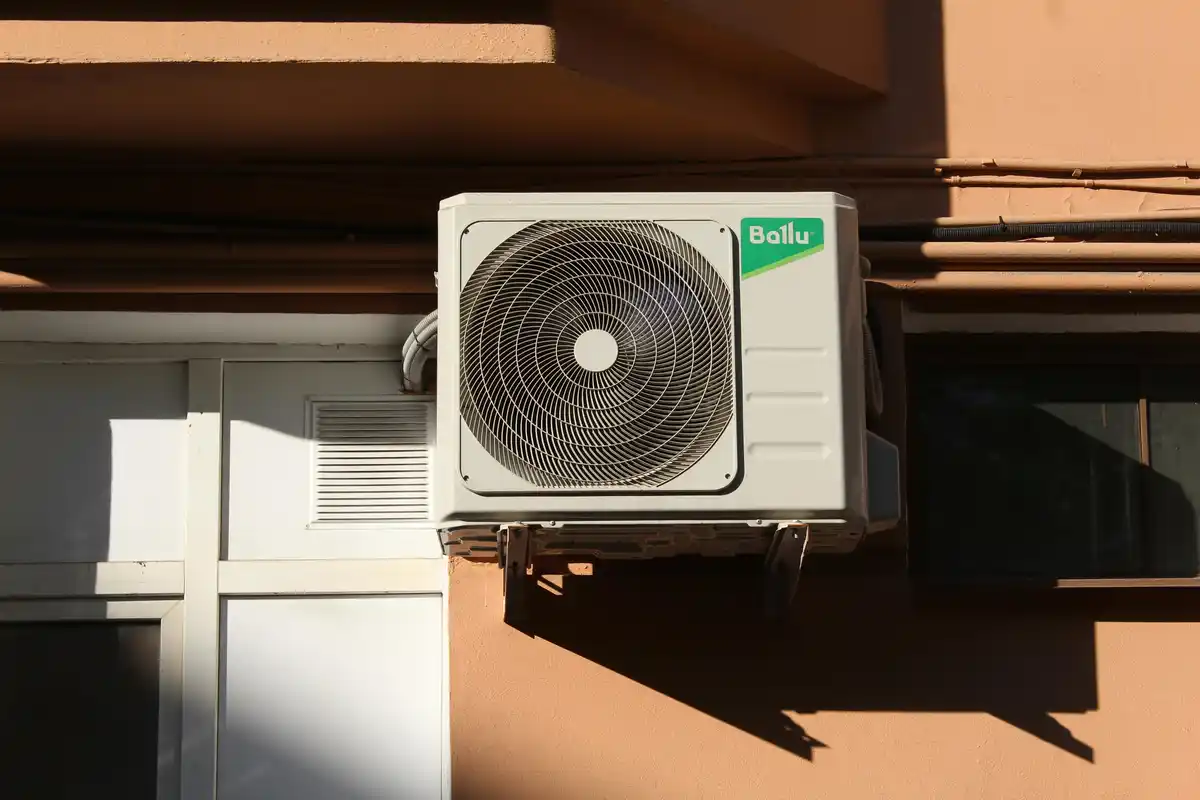
Clear Debris Around the Outdoor Unit
Neglected outdoor units collect layers of leaves, grass clippings and dirt that compromise cooling performance. A year’s worth of accumulated debris clogging the cooling fins can substantially reduce your system’s efficiency and accelerate wear. Performance can drop over 50% with inadequate ventilation, especially when ambient temperatures reach extreme highs or lows.
Why Clearance Around Your Unit Is Critical
Your outdoor condenser needs unrestricted airflow to function. Plants, leaves, grass clippings, mulch and branches that pile around the unit restrict airflow and force your system to work harder. Blocked airflow causes the equipment to run hotter. This shortens equipment life and increases operating costs. Multiple units positioned too close together compete for incoming cooling air and may feed hot exhaust to one another, raising operating temperatures further.
Rubbish stored behind the unit hinders airflow and causes freezing in winter and overheating in summer. Your outdoor unit experiences serious performance issues without knowing how to move high volumes of air. The system doesn’t deal very well with pleasing you by working harder, which reduces efficiency, causes additional problems and decreases overall unit lifespan.
How to Properly Clear the Outdoor Area
Start by hoovering up grass clippings, leaves and debris from the exterior fins using a soft brush attachment. Use this same soft brush to remove dust buildup on the fins and debris at the unit’s bottom. Clear away all bushes, weeds and grass within 2 feet of the condenser.
Trim back vegetation at least 2 to 3 feet around the unit. After mowing your lawn, use a leaf blower or broom to remove grass clippings from the area. Clippings blown toward the system during mowing restrict airflow. Avoid stacking yard tools, bikes or pool toys near the unit.
Check for debris after severe storms or every season. Sticks, leaves and rocks can blow into the condenser coil during bad weather. Remove the side panel to access interior components and inspect for lodged debris. Pet hair and dander require special attention, especially if you have a large, hairy dog living outside. Dog hair can form a mat against the coil back and act like a blanket that reduces airflow and performance.
Recommended Clearance Distance
Maintain at least 2 feet of clearance around your unit to operate efficiently. Some sources recommend 2 to 3 feet of clear space. Manufacturer guidelines suggest allowing at least 12 inches distance to walls, fences or similar solid obstructions. AC standards recommend around 300mm of clear space in every direction from the unit itself, with some installers suggesting 30 to 50cm clearance on all sides.
Avoid obstructions within 2 meters of the front of your outdoor unit. Walls, fences or dense plants too close cause air to bounce back toward the unit. Grass acts as a barrier preventing decent airflow and blocking warm air exhaust from your home.
Common Debris Problems to Watch For
Leaves rank as the most common obstruction found in outdoor units. Sticks, rocks and surface dust also accumulate. Technicians frequently discover bird nests, layers of dirt, clogged drain lines and corrosion in unchecked units. Pet hair creates stubborn blockages that may require professional cleaning with foam cleaner to push hair outward from coil fins. Any outside object entering the condenser cabinet can damage motors and fan blades, impairing operation.
Inspect and Clean the Condensate Drain Line
Clogged AC drain lines rank as a fairly common cause of system malfunction. Your AC removes moisture from indoor air and collects it in a condensate pan before draining outdoors through a small PVC pipe. Dust, algae, sludge and debris accumulate inside the line over time. The opening narrows and water movement slows. Water backs up into the drain pan as the clog grows and can cause damage to walls, ceilings and flooring.
Why Drain Line Maintenance Prevents Water Damage
A single clog can damage walls, ruin insulation and damage electrical components. Water gushing down ceilings remains a common sight after drain lines clog and overflow. Drywall, flooring and wood framing suffer when moisture keeps collecting in the same spot. Water may overflow from the condensate pan and soak walls and floors. Walls exposed to prolonged water immersion may peel or develop mold. Floors warp or lift due to moisture. Water seeping near electrical circuits can trigger short circuits or electrical leaks.
How to Check for Drain Blockages
The system’s power should be turned off at both the circuit breaker and thermostat before you start any inspection. Locate the drain pan at the bottom of your indoor unit. Check for standing water. The drain line may be blocking flow if water sits in the pan. The access cap near the indoor vent should be removed. Look for visible blockages using a flashlight. A small amount of clean water should be poured into the pan. Watch for drainage. Find the pipe’s end outside and check for mold, dirt or insects. Water dribbles slowly or stops completely if the clog sits near the outlet.
Signs of a Clogged Condensate Drain
Watch for these warning indicators:
- Water pooling around the indoor unit or air handler
- Musty, moldy smell near your unit or from registers
- Full or overflowing condensate pan
- AC system shuts down randomly or won’t turn on
- System stops cooling your home properly
- Increased indoor humidity despite AC running
Professional Drain Line Cleaning
HVAC technicians use suction from a shop vacuum or wet vac to clear clogs. They might also use a garden hose or plumber’s snake to remove blockages. Technicians follow up with a complete cleaning using commercially available cleaners designed for PVC piping once the line is cleared. Pour a cup of distilled vinegar down the drain line every 1 to 3 months between professional visits. This kills algae and mold without corrosive risks.
Check and Adjust Your Thermostat
Thermostat problems often masquerade as larger HVAC issues. Homeowners call for repairs when battery replacement solves the problem. Your thermostat controls when your system turns on and off. It manages energy usage and system efficiency.
Why Thermostat Accuracy Affects Efficiency
Thermostat location, calibration status, and nearby drafts or heat sources affect displayed temperature readings. Your thermostat displays inaccurate readings and misleads you about actual indoor temperature. Your system operates longer than necessary and wastes energy. Incorrect temperature settings increase energy consumption and reduce efficiency. Malfunctioning thermostats send incorrect signals that trigger short cycling due to dirt buildup or electronic glitches. Your unit turns on and off frequently. This pattern stresses your system and reduces its lifespan.
How to Test Thermostat Functionality
Place a reliable thermometer 5 to 6 inches away from your thermostat on the same wall. Wait 15 to 20 minutes for both devices to stabilize and compare readings. Your thermostat requires recalibration or replacement if readings differ by more than 2 degrees. Smart thermostats have a built-in test function. Guide through settings to find it and follow on-screen instructions. Standard thermostats need a different approach. Position one person by the thermostat and another by the furnace. Turn the thermostat from off to heat while increasing temperature. Both the thermostat and furnace should make sounds.
When to Replace Thermostat Batteries
Swap batteries once a year to avoid surprises. Batteries need changing about once every year as a rule. Replace them as the manufacturer recommends. You’ll notice warning signs before a thermostat quits. The screen fades or goes dark. A low-battery message blinks on the display. The system doesn’t respond when you adjust temperature. Most programmable models show a low battery indicator around one to two months before batteries run out. Remove the thermostat cover to replace batteries. Take out old batteries while noting their orientation and insert new ones matching the plus and minus symbols. Snap the cover back on.
Upgrading to a Smart Thermostat
Smart thermostats learn your routines and adjust temperature automatically. You eliminate manual adjustments multiple times daily. They can save around 10 to 15 percent on heating bills and about 15 percent on cooling bills each year. These devices offer geofencing that adjusts temperatures based on your location and detailed energy consumption reports. They integrate with voice assistants. Call a technician for wiring checks or unit replacement if your thermostat still fails after new batteries or wires appear loose or damaged.
Dirty coils act as insulators that undermine your system’s heat transfer capability. A rise in condensing temperature from 35 to 40°C due to dirty coils cuts cooling capacity by 7% and increases power consumption by 16%. A dirty condenser coil can increase compressor energy consumption by 30%. Poor coil performance forces other air conditioning components to work harder or longer. This reduces life cycles and can cause catastrophic compressor failure.
Why Coil Cleaning Improves Cooling Performance
Dirt, dust, debris and pollutants build up on coil surfaces over time due to tight fin spacing, surface moisture from cooling and constant airflow. This buildup reduces your system’s heat transfer capability and decreases cooling effectiveness. Dirty coils increase operating temperatures and force fans and compressors to work harder. They also reduce comfort by limiting your system’s capability to remove humidity during cooling.
How to Safely Clean Outdoor Condenser Coils
Clear loose debris like leaves, sticks and grass clippings from around and on top of the unit. Use a soft brush to gently brush coil fins and move only in the direction of the fins to avoid bending them. Apply a non-corrosive, metal-safe cleaner designed to clean outdoor coils. Rinse with low-pressure water from inside out to flush debris away. Never use a pressure washer that can permanently bend fins or damage electrical components. Allow 15 to 30 minutes for natural drying.
Indoor Evaporator Coil Maintenance
Leave evaporator coil cleaning to professionals, as your system contains high-voltage components that untrained individuals can damage. DIY maintenance can invalidate your warranty. Professionals turn off power, remove access panels and use soft brushes or shop vacs to remove surface grime. They apply approved chemical cleaners, inspect refrigerant leaks and clean drain pans.
When to Schedule Professional Coil Cleaning
Schedule professional coil cleaning at least once yearly before summer. Homes in coastal, dusty or humid areas benefit from twice-yearly service. Professional cleaning restores cooling capacity and reduces system strain. It improves airflow and indoor air quality while protecting equipment during peak demand.
Inspect Electrical Connections and Components
Why Electrical Maintenance Prevents System Failure
Air conditioners rely on capacitors, relays, wiring, contactors and control boards that degrade over time. Capacitors provide the initial electrical boost to start compressor and fan motors but weaken after years of use. A failing capacitor causes your AC to struggle starting, draw excessive current or refuse operating. Contactors switch high-voltage current to the compressor and outdoor fan. They pit or burn over time and lead to intermittent operation or complete failure. Loose wiring connections generate heat. Arcing damages insulation and poses fire risks. Simple part replacement instead of full system failure becomes possible when regular inspections detect these issues early.
What to Look for During Electrical Inspections
Professional maintenance begins with a complete visual inspection of all available electrical components. Electricians check outdoor unit contactors, capacitors and wiring along with indoor fan motors and control boards. Visible wear, damage or corrosion serves as common indicators of impending failure. Visual checks alone don’t suffice. Precise testing proves vital. Technicians use specialized tools that measure voltage, amperage and resistance in parts of all types. Capacitors remain within operational range or have started failing. Capacitance tests determine this. Motors work too hard due to mechanical issues or electrical inefficiency. Motor current draw measurements indicate whether this happens.
Signs of Electrical Problems
Watch for unusual noises like clicking or buzzing, frequent circuit breaker tripping, reduced cooling capacity or burning smells. These indicators just need immediate electrical inspection. Electrical overload or short circuits somewhere in your system cause repeated breaker tripping.
Safety Considerations for Electrical Work
DIY electrical work on AC units remains unsafe. These systems involve high voltage and complex wiring. Qualified, licensed electricians ensure safety and proper functioning.
Check Refrigerant Levels and Pressure
Why Proper Refrigerant Levels Are Essential
Refrigerant absorbs heat from inside your house and releases it outdoors to maintain cool temperatures. Your AC loses the ability to perform this function when refrigerant levels drop. A 30% undercharge can drop cooling output by 50%. Low levels force your system to work harder and increase energy consumption while potentially damaging components. The evaporator coil freezes when refrigerant is insufficient. This results in weak airflow or warm air from vents. The compressor may overheat and fail, an expensive repair most homeowners dread. Proper refrigerant levels remain critical for efficiency, comfort and equipment longevity.
Signs of Low Refrigerant
Watch for these indicators that point to refrigerant issues:
- Reduced cooling efficiency and rooms feeling warmer than set temperature
- Ice formation on evaporator coils or refrigerant lines
- Hissing or bubbling sounds that indicate refrigerant leaks
- Higher energy bills without usage changes, sometimes 15-25% increases
- Short cycling where the AC turns on and off at irregular intervals
- Increased indoor humidity as moisture removal decreases
Refrigerant doesn’t “run out” like fuel. It circulates in a closed loop. Low levels indicate a leak that requires professional attention.
How Professionals Check Refrigerant
Specialized equipment and expertise are required to check refrigerant. Technicians use manifold gage sets to measure pressure along with temperature probes. They test for superheat or subcooling depending on your system’s orifice type. High-pressure readings substantially above recommended ranges indicate overcharging, while low-pressure readings suggest insufficient refrigerant. Professionals also measure system performance factors beyond simple pressure. EPA certification is required to add refrigerant, and doing so without it remains illegal.
Refrigerant Leak Detection
Technicians employ electronic leak detectors, UV dyes and pressure testing to locate leaks[272]. Common leak points include flared connections, brazed joints and service valves. Leaks must be located and repaired before replacing leaked refrigerant.
Restricted airflow sabotages cooling performance while driving up operating costs. Professional airflow testing moves beyond guesswork by measuring actual air movement through your system using specialized diagnostic equipment.
Why Airflow Testing Reveals Hidden Issues
Technicians measure CFM (Cubic Feet per Minute) or L/s (Liters per Second) to calculate exact airflow from each vent. Airflow below 25 L/s signals blockages, leaks, or disconnected ductwork sections. Pressure differential testing identifies system restrictions invisible during simple inspections. Static pressure measurements determine whether filters, coils, or duct issues choke airflow. These diagnostics pinpoint collapsed duct segments and poorly sealed joints that create uneven temperatures.
How to Check Airflow Throughout Your Home
Hold tissue paper near each register while your system runs. Strong suction or airflow indicates proper function. Barely moving paper suggests restrictions. Compare airflow strength between rooms and notice which spaces feel warmer or receive weaker air output. Check for closed or blocked vents preventing circulation. Verify interior doors remain open, as closed rooms disrupt airflow patterns throughout your home.
Common Causes of Poor Airflow
Filters and debris aren’t the only culprits. Frozen evaporator coils block air passage. Leaky ductwork steals conditioned air before reaching vents. Blower motor failures reduce air movement across all registers. Undersized or poorly routed ductwork don’t deliver adequate air to distant rooms very well.
Measuring System Efficiency
SEER (Seasonal Energy Efficiency Ratio) measures cooling efficiency over entire seasons, with minimum ratings of 14 required for rebate programs. EER (Energy Efficiency Ratio) reflects efficiency at 95°F outdoor temperatures. HSPF (Heat Seasonal Performance Factor) gages heat pump heating efficiency and requires minimum 9 HSPF for program qualification. Higher ratings indicate superior efficiency and lower operating costs.
Friction between moving components generates heat that accelerates wear and triggers breakdowns that get pricey. Improper lubrication causes 36% of premature bearing failures in electric motors. Metal-to-metal contact damages bearings without adequate lubrication. This shortens equipment life and increases energy consumption.
Why Lubrication Prevents Mechanical Failures
Lubrication creates a protective film between moving parts. This minimizes contact and prevents excessive wear. The protection extends your system’s lifespan and improves performance overall. Effective lubrication also reduces operational noise. It cushions the effect between components. Proper lubrication reduces friction and allows smoother operation. Less energy is needed to overcome mechanical resistance. This results in improved efficiency and lower operating costs.
Which Components Need Regular Lubrication
Motor bearings rank as the most critical lubrication point. Bearing issues cause 41-44% of electric motor failures. Pillow block bearings on belt-drive blowers need greasing every 2,000 to 4,000 run hours. Use lithium EP or polyurea grease. Never exceed 30 to 50% bearing cavity fill. Excess grease creates friction and causes electrical failures. Compressors require specific oil types and amounts to function right.
How to Inspect Blower Motor and Fan Belts
Inspect belts monthly for cracks, fraying, or glazing (shiny surfaces). Check tension using the 1/2 inch deflection test. Verify pulley arrangement using a straight edge across both sheaves. Remove belts for thorough inspection between cogs. Cracks hide there.
Signs of Worn or Damaged Belts
High-pitched squealing when starting indicates slipping or misarrangement. Visible cracks signal dryness from age and heat exposure. Frayed edges or glazed surfaces require replacement right away. Never apply lubricant to belts. It causes slippage and deterioration.
Vents and ductwork receive attention rarely, unlike filters and coils. Yet neglected maintenance creates serious health risks and efficiency losses. People clean ducted systems less frequently than split-system units. This poses health concerns and causes systems to run inefficiently. Parts break and power bills increase.
Why Vent and Duct Maintenance Air Conditioner Unit Needs
One in six suffer from medical conditions aggravated by poor air quality. Dust and lint accumulate inside ductwork and create perfect breeding grounds for bacteria. Your AC starts producing odors when filtration is improper. Dust buildup appears on furniture throughout your home. Some fires have started due to restricted airflow through return air ducts caused by accumulated dust and lint. Therefore, regular maintenance air conditioner unit care protects both health and safety.
How to Clean Air Vents and Registers
Turn off your system before cleaning. Vacuum vents using a soft brush attachment or dry microfiber cloth. Wipe visible dust from surfaces and moveable vents. Unscrew vent covers once or twice yearly for deeper cleaning and wash them in warm, soapy water using small amounts of dish detergent. Rubbing alcohol cuts through oily residue. Dry covers completely before reinstalling to prevent dust adhesion.
Inspecting Ductwork for Leaks
Typical homes lose 20-30% of conditioned air through holes, leaks and disconnected ducts. Professional ductwork sealing using the Aeroseal method can last 40 years when applied properly.
Benefits of Professional Duct Cleaning
Professional service should occur yearly and include filter, duct and register cleaning. Specialized equipment removes contaminants that DIY methods miss. Professional cleaning reduces energy costs, improves air quality and extends HVAC system lifespan.
DIY ac unit maintenance handles routine tasks, but professional technicians possess specialized tools and training to detect issues invisible to homeowners. Routine maintenance has been shown to improve HVAC system efficiency by up to 30%. You can enjoy major savings on energy bills through scheduled professional care.
Why Professional Maintenance Is Essential
Technicians identify potential risks early, such as worn components or small leaks that could lead to bigger and costlier issues down the line. Emergency repairs cost 2-5 times more than planned service. Organizations maintaining systems reactively spend up to 50% more on total maintenance than those using structured preventive programs.
What’s Included in a Professional Service
Professional servicing has deep cleaning for peak performance, checking refrigerant levels and safety and performance testing. Technicians perform cleaning on indoor and outdoor units and test all functions. They inspect return air grilles and get into every element of your outdoor unit including the fan and compressor.
Best Time to Schedule Your Annual Tune-Up
Schedule maintenance air conditioner unit service in early spring before summer heat arrives. Spring offers more technician availability and convenient appointment times. Having your system serviced before summer will give it the ability to handle the first heat wave.
Cost Savings from Preventive Maintenance
Proper maintenance reduces energy consumption by 15-20% annually. Predictive maintenance extends equipment life by 5-10 years and defers hundreds of thousands in capital expenditure.
Keep Your AC Running Smoothly Year-Round
Just to restate, consistent AC unit maintenance protects your wallet and extends equipment life. Implementing all 11 tasks may seem overwhelming at first. Start with simple steps like replacing filters monthly and clearing debris around your outdoor unit. Add seasonal tasks such as cleaning vents and checking your thermostat once those habits stick. Schedule professional service annually to catch problems before they escalate into expensive repairs. DIY maintenance handles most routine care, but technicians detect hidden issues that prevent breakdowns. Your system works hard keeping you comfortable year-round. Invest time in these preventive measures and enjoy lower energy bills, cleaner air and reliable cooling for years to co
Comments on this guide to AC unit maintenance tasks to prevent costly repairs article are welcome.
Architecture
Comments / photos for the AC unit maintenance tasks to prevent costly repairs advice page welcome